Summary
How To Sell On WordPress eCommerce
If you clicked this article, you’re probably a retailer who wants to know if WordPress is a viable option to set up your online store.
WordPress is a free all-in-one software that requires its users to have some website building and technical setup skills. However, the available plugins and thousands of themes you can choose from allow you to virtually build any kind of website you want.
If you’re considering starting your online store on WordPress, here’s a guide on how to set up your WordPress eCommerce store in a few simple steps.
How to create a WordPress eCommerce store
Step 1: Pick your domain name and hosting provider
The first step is to buy a domain name (your online store’s web address) and choose a hosting provider for your site that allows for WordPress to be installed. If you have an existing WordPress website, skip to Step 3.
Having your own website domain looks more professional. Ideally, your domain name should reflect your brand and business, be short, easy to pronounce and remember. Depending on what you choose, fees vary from $10 to $80 a year.
If you’re unsure of the difference between having a .com or .sg domain, this article on domain registration in Singapore by Construct Digital covers all you need to know.

Hosting providers ensure your site loads quickly and minimise downtime. Depending on how much traffic you think your store will receive, get either a shared or dedicated hosting provider. WordPress recommends BlueHost, Dreamhost and SiteGround.
Find our our list of 10 best sites to buy a domain name for e-commerce business.
Step 2: Install WordPress
The next step is to install WordPress on your hosting account. If you’ve chosen a hosting provider that supports WordPress, it should be a one-click install. Follow the instructions accordingly.
If not, manually set up a server before installing and configuring WordPress onto the said server. Typically, only more advanced, code-savvy users select this option. In this case, reference this detailed guide on how to install WordPress manually.
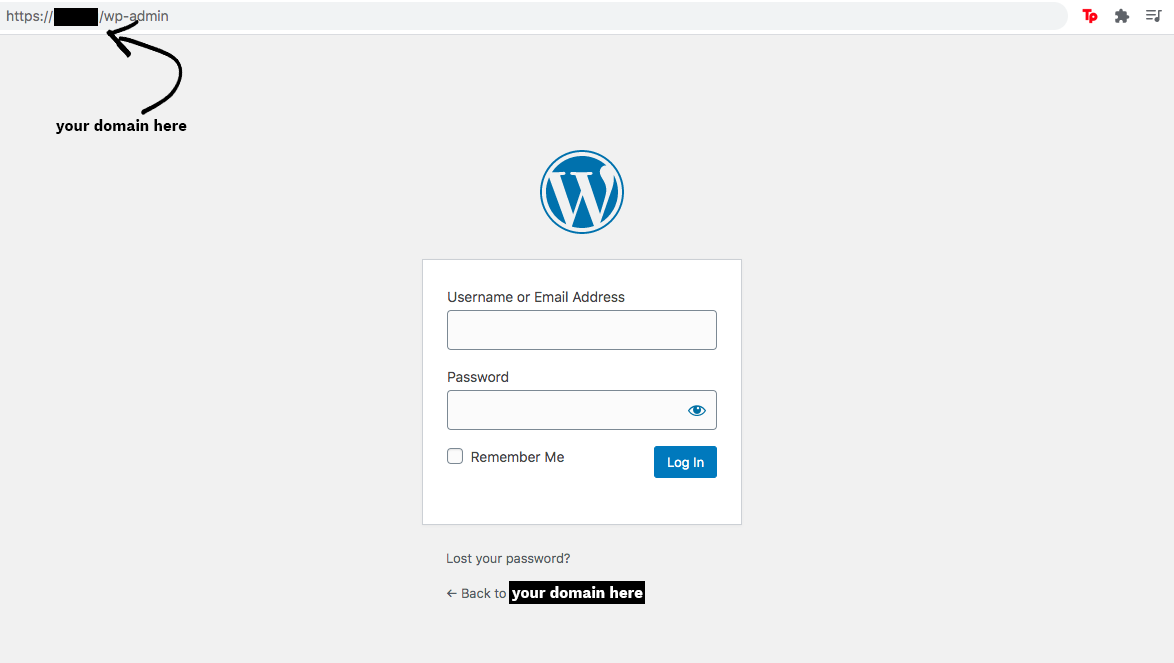
At this point, you should be able to log in to your admin panel by inserting ‘/wp-admin’ after your domain.

Step 3: Download eCommerce plugin
To sell products directly from your site, install an eCommerce plugin. This will provide you with necessary features such as shopping carts, product catalogs, online payments and coupons.

The free, highly customisable WooCommerce plugin is arguably one of the most popular. It allows you to create and organise product inventory, manage taxes, provide shipping, have a complete shopping cart and checkout process and secure payments. Other paid and free extensions can also be included to improve the user experience.
To access download plugins, follow these steps:
- Go to your WordPress Dashboard
- Click on the Plugins section in your sidebar
- Click ‘Add New’
- Search for eCommerce plugin options
- After selecting the option you want, click ‘Install Now’
- Wait for it to be downloaded then press ‘Activate’
You’ll be redirected to a launch or setup page and follow the on-screen instructions to fully install the plugin.
Step 4: Configure your online store
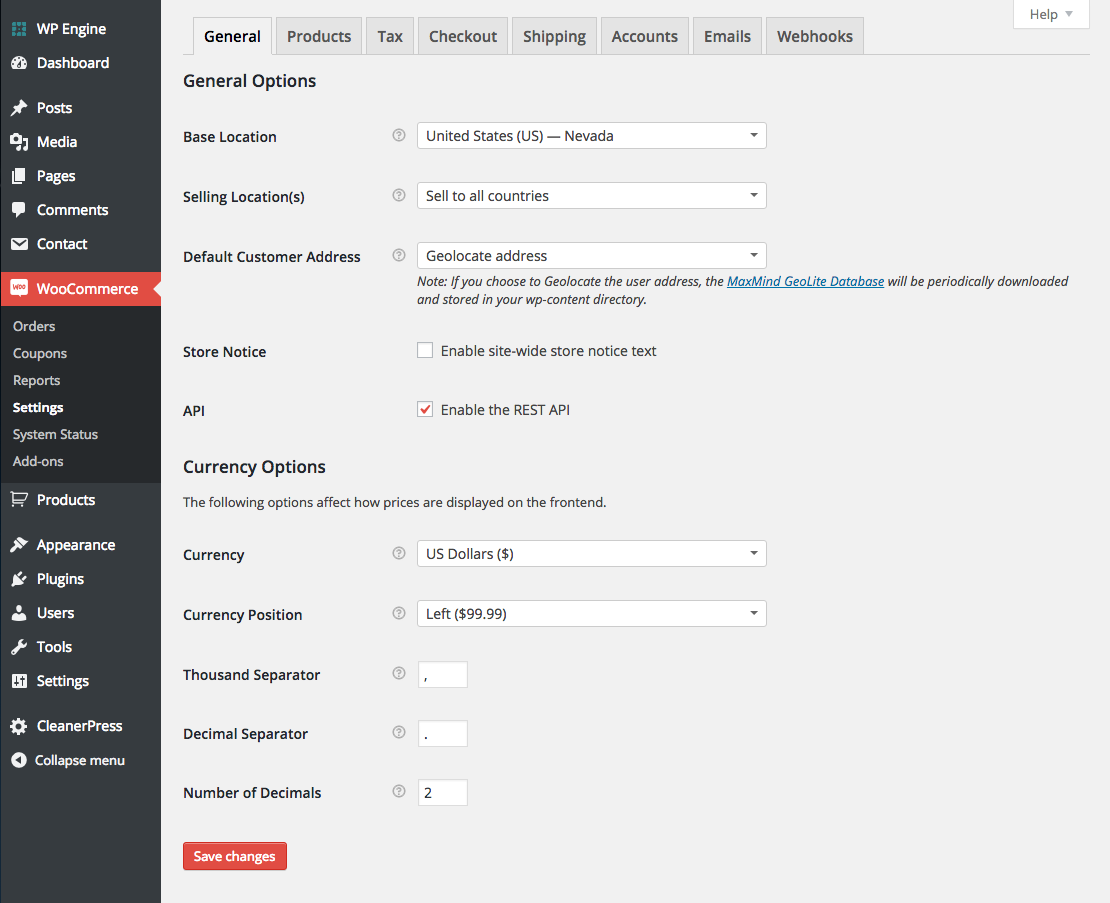
Under ‘Settings’, spend some time to configure your entire store.

For instance, under WooCommerce there are different things to adjust under each tab. They are:
- Location and currency under General
- Measurement units, review options, product and shop options, product image cropping and inventory options under Products
- Tax options under Tax
- Cart and checkout pages, terms and conditions, coupons and discount options, and payment methods under Checkout
- Shipping methods, locations and costs under Shipping
- Customer user accounts and registration under Accounts
- Email options and templates to communicate with customers under Email
- Signal popup coupon codes under Webhooks
Step 5: Add your products
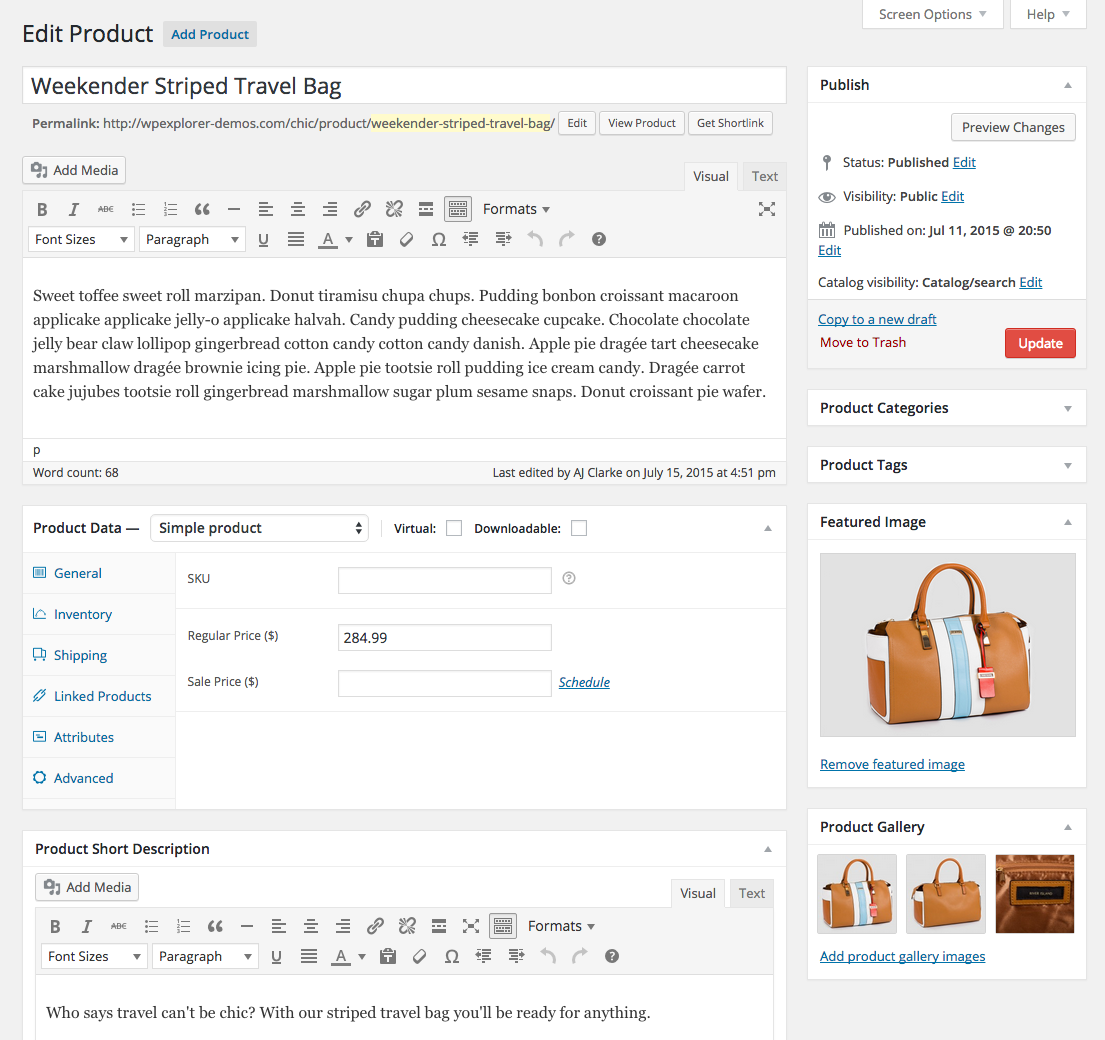
With the plugin installed, start to add your product and the relevant descriptions and pictures. Select ‘Products’ on the sidebar and select ‘Add Product’. You should minimally ensure that you have a product title/name, price, image and description.

Use clear, high-quality images and provide multiple angles and closeup shots of your product. Have your product category and tags in order too so your potential customers will have an easier time browsing for products.
Don’t forget to ensure your product title and description are SEO-optimised to increase product search visibility. There are additional SEO plugins you can download to help boost your Google search rankings.
Step 5: Install a WordPress theme
You’ll want to install a WordPress theme to make your store look more aesthetically pleasing and on-brand. You should pick one that has a clear, unconfusing design to make your online store as user-friendly as possible. What you want in a theme is flexibility to fit your changing needs.
Add shopping cart to WordPress
The last thing you have to do is to insert a shopping cart and set up payment. A shopping cart facilitates orders, stores product information and accepts payment for a smoother customer experience.
This would come with the eCommerce plugin you are using or you can download additional plugins (e.g. WordPress Simple PayPal Shopping Cart). And you’re done!
Sources to get the best WordPress themes
There are thousands of free and paid WordPress themes to choose from.
Here are some sources you can browse (sorted by cost):
- X ($29/lifetime)
- Ultimatum ($55/yearly or $499/lifetime)
- Uncode ($59/lifetime)
- OceanWP ($59/yearly or $159/lifetime)
- Themify Builder ($59/yearly or $249/lifetime)
- Genesis ($59.95/lifetime)
- Avada ($60/lifetime)
- Divi ($89/yearly or $249/lifetime)
- CSSIgniter ($69/year, or $199/lifetime)
- Thesis ($87/yearly)
- Dynamik ($149/yearly or $599/lifetime)
Is WordPress a good eCommerce platform?
WordPress is more suited for a savvy digital user. There is no direct support team you can contact for WordPress. However, there is a very helpful and supportive WordPress community you can seek help from.
Still, potential online retailers should not be deterred. Its free WooCommerce plugin grants you extremely helpful features to make your customers’ user journey a pleasant one.


%201.webp)


.webp)